CAD interior design has transformed how homeowners approach renovation and decoration projects. Instead of relying on sketches, imagination, or trial-and-error furniture placement, you can now visualize your space in precise, scale-accurate detail before spending a dime. Whether you’re planning a kitchen overhaul, reorganizing a bedroom, or tackling a full home redesign, CAD (Computer-Aided Design) tools let you experiment with layouts, materials, and furniture arrangements digitally. This practical guide walks you through the essentials, from understanding CAD basics to selecting the right software and creating professional-quality floor plans.
Table of Contents
ToggleKey Takeaways
- CAD interior design eliminates costly mistakes by visualizing your space in precise, scale-accurate detail before purchasing furniture or starting renovations.
- Accurate measurements and a solid base floor plan are critical—measure room dimensions, door locations, windows, and built-in features to the nearest quarter inch before creating your design.
- Mid-range CAD tools like Autodesk Homestyler and Floorplanner ($10–$25/month) offer the best balance for homeowners, while free options like SweetHome3D work well for small projects.
- Test furniture placement and traffic flow digitally by using standard furniture dimensions (queen bed: 60×80 inches, standard sofa: 84×36 inches) to ensure pieces fit and walkways remain clear.
- Switch to 3D view and test material colors under different lighting conditions to understand how your space will actually feel before committing to purchases.
- Export your final CAD plan as a PDF and share it with contractors or use it as a reference while shopping, ensuring professional communication and accurate product specifications.
What Is CAD Interior Design and Why It Matters
CAD interior design is the process of using specialized software to create two-dimensional and three-dimensional representations of interior spaces. Think of it as a digital blueprint that shows you exactly how your room will look before you buy a single piece of furniture or paint a wall.
Here’s why it matters: mistakes in real space are expensive. A poorly planned layout wastes square footage. Buying furniture that doesn’t fit costs money and frustration. CAD eliminates guesswork. You can test multiple design schemes, check sightlines, measure traffic flow, and verify that your sofa actually fits through the doorway, all on screen.
For DIY homeowners, CAD tools serve a practical purpose: they help you plan with confidence and communicate ideas clearly if you’re working with contractors, painters, or electricians. A scaled floor plan showing exact dimensions and placement beats a verbal description every time. You’re also documenting your design choices, which is invaluable when shopping for materials or tweaking layouts mid-project.
Essential CAD Software for Interior Design Projects
The CAD software market ranges from free, beginner-friendly tools to professional-grade platforms costing thousands. For most homeowners, mid-range or free options work perfectly.
Paid Options like SketchUp Pro (~$299/year) and Chief Architect are industry standards. SketchUp has a gentler learning curve and extensive libraries of furniture, materials, and textures. Chief Architect is heavier-duty, better for structural detail and building codes, but steeper to learn. AutoCAD ($1,620/year) is the professional workhorse, powerful but overkill for residential DIY unless you’re already familiar with it.
Mid-Range Tools like Autodesk Homestyler and Floorplanner (~$10–$25/month) offer strong feature sets without overwhelming complexity. They handle floor plans, 3D visualization, and material selection intuitively. Homestyler particularly shines for furniture placement and color schemes.
Free and Affordable Options for Beginners
If you’re new to CAD or testing the waters, start here. LibreCAD and SweetHome3D are genuinely robust free options. SweetHome3D especially excels at residential design, drag-and-drop furniture, multiple viewing angles, and reasonable rendering quality. Floorplanner Free gives you one basic project: upgrade if you want more.
IkeaPlace (free via IKEA’s app) and Wayfair’s room planner are thin but handy for specific pieces. They won’t replace full CAD, but they’re useful for validating furniture scale in your actual space using augmented reality.
The trade-off: free tools are limited in texture detail, file export options, and library size. Paid tools offer more control and polish. Pick based on your project scope. A small bedroom refresh? Free is fine. A whole-house renovation with multiple rooms and custom finishes? Invest in mid-range software.
Getting Started: Basic Tools and Techniques
Start by gathering basic information about your space. Measure room dimensions, width, length, height, door locations, window openings (including frame width), and wall thickness. Use a 25-foot tape measure and note measurements to the nearest quarter inch. Include built-in features: fireplaces, HVAC vents, outlets, and load-bearing walls if you’re planning structural changes.
Next, choose your software and open a new project. Most programs ask for room shape first. Input your measurements, then adjust walls to match. Don’t rush: accuracy here prevents frustration later. Import or create doors and windows at the correct positions and sizes. Nominal door openings are 32 inches wide for interior doors, 36 inches for entry doors, but measure yours to be sure.
Familiarize yourself with the toolbar: selection tool, draw walls, add windows and doors, place objects, and measure. Spend 15–20 minutes playing with each. Most software includes tutorials or templates: use them. Many homeowners skip the learning curve and jump straight to designing, then waste time troubleshooting basic operations.
Creating Accurate Floor Plans and Layouts
A floor plan is a bird’s-eye view of your room showing walls, openings, and spatial relationships. It’s the foundation for everything else.
Steps to create an accurate floor plan:
- Input room perimeter and dimensions with precision. Double-check against your tape measure notes.
- Place doors and windows at exact locations. Mark swing direction (doors swing inward or outward into the room).
- Add fixed features: built-ins, fireplaces, HVAC returns, electrical outlets, and light switches. These don’t move, so position them first.
- Establish a scale (typically 1/4 inch = 1 foot in residential drawings). Most software does this automatically once you input dimensions.
- Save this base plan. You’ll create variations from it.
Common mistakes: forgetting door swing radius (a door needs clearance to open fully without hitting walls or furniture), ignoring traffic flow (the path you walk from entry to the room’s purpose), and neglecting outlet locations (you’ll want charging stations for lamps, TVs, and devices). Check Modern Interior Design principles for spatial flow and Office Interior Design tips if working with workspace layout.
Once your base plan is solid, create different layout options. Duplicate the floor plan (most software allows this) and try furniture arrangements. This is where CAD saves hours of moving real furniture.
Designing Your Space: From Concept to Final Plan
Now that you have an accurate floor plan, it’s time to layer in furniture, colors, materials, and lighting. This is where your space becomes a living vision.
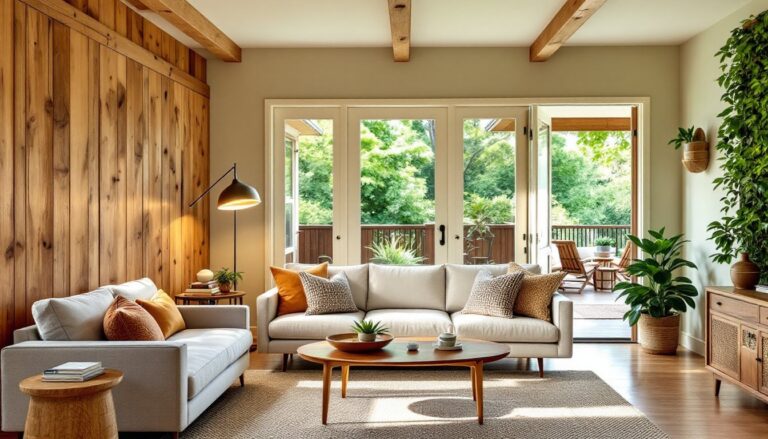
Start with a furniture plan. Measure your actual furniture or use standard dimensions: a queen bed is roughly 60 inches wide by 80 inches long: a standard sofa is 84 inches wide by 36 inches deep: a dining table for six is 36 inches by 72 inches. Import or place these items on your floor plan at their true scale. This immediately reveals whether your layout works. Does the sofa fit the wall? Can you walk around the coffee table? Will a nightstand fit beside the bed? These questions answer themselves visually.
Function guides placement. Arrange furniture around the room’s purpose. In a bedroom, the bed is the focal point: position it for clear sightlines from the door. In a living room, seating should face the TV or window view. Avoid blocking natural light and traffic paths. Leave at least 18 inches of clearance on major walkways.
Traditional design relies on rules like the 60-30-10 color formula (60% dominant color, 30% secondary, 10% accent) or spacing and scale principles. CAD lets you test these rules digitally.
Visualizing Furniture, Colors, and Materials
Most CAD tools include libraries of furniture, finishes, and materials. Assign materials to walls, floors, and furnishings. A light oak hardwood floor reads differently than dark walnut or neutral concrete. Similarly, paint colors shift under different lighting. Test your scheme in both daylight and evening views if your software supports lighting simulation.
Switch to 3D view. This is revelatory. Walking through a digital 3D model shows you exactly how a space feels, whether it’s cramped, airy, balanced, or visually chaotic. Notice sightlines: what do you see from the doorway? From the sofa? A cluttered 3D view often means your layout is busy.
Check Interior Design App resources for inspiration on transforming spaces visually. Platforms like MyDomaine and Architectural Digest showcase real interiors with measurable proportions you can reference in your CAD model.
Material selection matters practically, not just aesthetically. If you’re showing your CAD plan to contractors or shopping for fixtures, specify actual products: cabinet door style, paint finish (matte, satin, semi-gloss), flooring type, countertop material. Generic textures are fine for concept: specific products prepare you for real costs and lead times.
Export your final plan as a PDF or image. Share it with contractors, family members, or refer to it while shopping. Many homeowners print a scaled version and tape it to walls as a reference during installation.