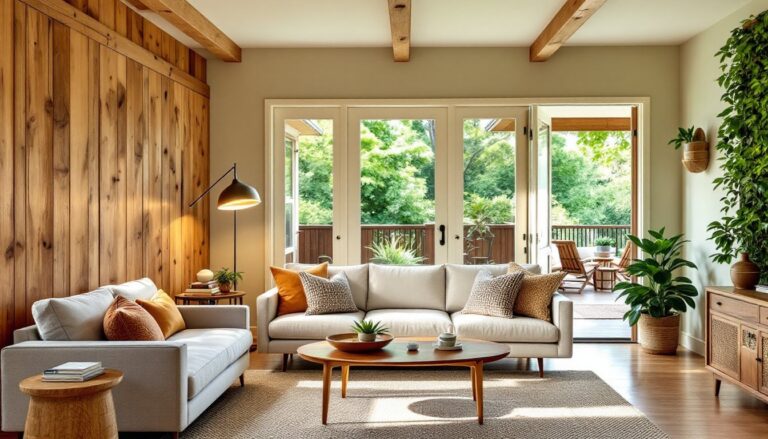
Creating a med spa interior design at home blends the clinical precision of medical aesthetics with the comfort and tranquility of a luxury wellness retreat. Unlike traditional spas, med spas require a thoughtful approach that combines soothing ambiance with functionality, think calming color schemes, strategic lighting, and materials that support relaxation without sacrificing cleanliness or durability. Whether you’re converting a spare bedroom, a basement corner, or planning a dedicated wellness room, med spa interior design principles help homeowners build spaces where relaxation and self-care feel genuine, not forced. This guide walks you through the practical steps and design choices that transform any room into a serene sanctuary.
Table of Contents
ToggleKey Takeaways
- Med spa interior design blends medical-grade functionality with calming aesthetics using moisture-resistant materials, layered lighting, and strategic zoning to create a professional yet tranquil wellness retreat.
- Choose calming color palettes of soft sage green, warm gray, or muted blue on 60–70% of wall space, paired with low-VOC paint finishes and satin sheens that resist staining and support air quality.
- Invest in a quality heated treatment bed upholstered in commercial-grade vinyl or performance fabric—a cornerstone piece worth $800–2,500 that signals luxury and durability over budget alternatives.
- Layer dimmable LED lighting in 2700K color temperature with indirect ambient sconces or cove lighting to eliminate shadows, while reserving focused overhead treatment lights for active procedures.
- Install moisture-resistant drywall, luxury vinyl plank or large-format tile flooring with radiant heating, and commercial-grade fixtures to ensure the space withstands humidity, product spills, and frequent sanitization.
- Incorporate toxin-free, natural materials—low-VOC adhesives, linen textiles, and living plants—while minimizing open shelving and maximizing closed storage to maintain the serene, uncluttered aesthetic essential to med spa design.
Understanding Med Spa Aesthetics and Design Principles
Med spa interior design sits at the intersection of wellness, minimalism, and subtle luxury. Unlike day spas that lean heavily on atmospheric elements, med spas prioritize a clean, uncluttered environment where medical-grade equipment and treatments take center stage. The aesthetic should feel approachable yet professional, calming without being sterile.
Start by identifying your room’s structural limitations and assets. A med spa layout typically zones areas into consultation, treatment, and relaxation zones. Dedicated zones reduce noise bleed and give clients a clear sense of journey through the space. If you’re working in a smaller footprint, a single multipurpose room can work, but use furniture arrangement and subtle dividers (like low shelving or half-walls) to create visual separation.
Wallboard and architectural bones matter. Moisture-resistant drywall (also called cement board or greenboard) is smart in any wellness space where humidity from steam treatments, facial steamers, or foot soaks might occur. Install it on walls behind treatment areas and in any zone exposed to water. Standard drywall breaks down in high-humidity environments and creates mold risk, a serious health and structural issue.
Flooring deserves thought upfront. Luxury med spa design often features polished concrete, large-format tile, or luxury vinyl plank (LVP) in neutral tones. These surfaces stay cool underfoot, resist staining from skincare products, and clean easily. Avoid carpet in any treatment area: it absorbs moisture, product spills, and becomes difficult to sanitize. If you want warmth, radiant floor heating installed beneath tile is a game-changer for luxury comfort.
Color Palettes and Lighting for Relaxation
Choosing Calming Colors
Color psychology drives med spa interior design more than most homeowners realize. Greens, soft grays, warm whites, and muted blues reduce cortisol levels and signal safety to the nervous system. These aren’t designer opinions, they’re rooted in how our brains respond to wavelengths and associations.
Consider a base palette of soft sage green (a cool neutral with wellness connotations) or warm gray on 60–70% of wall space. Reserve accent walls or trim for deeper tones, forest green, soft taupe, or warm charcoal, to add sophistication without overwhelming the eye. Avoid pure white (too clinical) and busy patterns (too stimulating). A single accent wall in soft blue or warm stone tones gives visual interest and directs focus toward a focal point, like a treatment bed or meditation nook.
When selecting paint, prime surfaces with a quality primer first: this ensures color accuracy and improves adhesion on moisture-resistant board. Use low-VOC or zero-VOC finishes in treatment areas to avoid off-gassing and respiratory irritation. A satin or eggshell sheen (not flat) resists staining and cleans easily, critical in a space exposed to skincare products, oils, and occasional splashes. Expect to apply two coats: one coat rarely gives true coverage, especially on dramatic colors.
Optimizing Natural and Artificial Lighting
Lighting is the unsung hero of med spa design. Harsh overhead fluorescents? No. Dim, canned ambiance? Also no. The goal is layered, dimmable lighting that shifts based on the time of day and treatment type.
Maximize natural light if your room has windows, but add diffusion, sheer linen Roman shades or frosted film prevent harsh glare while maintaining privacy and calming filtered daylight. Position treatment beds perpendicular to windows when possible: direct sunlight during facials or injections is uncomfortable and exposes clients.
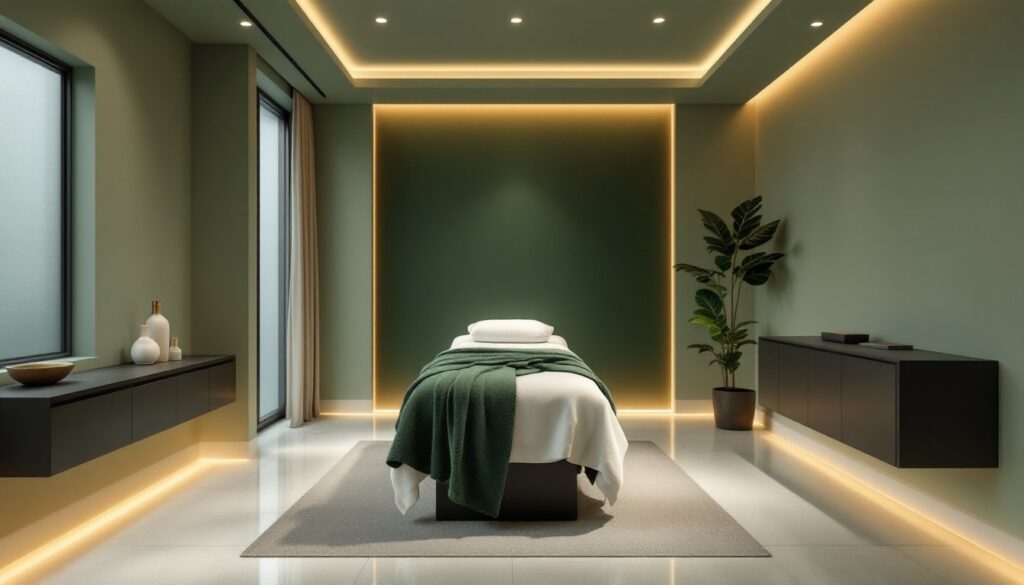
For artificial lighting, install recessed LED downlights on a dimmer switch (standard dimmers, not fancy smart bulbs that fail when you need them most) in 2700K color temperature. This warm white feels welcoming and doesn’t trigger alertness like 4000K or 5000K cool whites. Layer in indirect ambient lighting, wall sconces or cove lighting along upper wall edges, to eliminate shadows and create a floating, ungrounded feel. Indirect lighting also makes rooms feel larger.
Do not skimp on dimmer quality: cheap dimmers buzz, flicker, and degrade LED bulbs faster. A standard-grade rotary or slide dimmer from a recognized brand costs $15–30 and lasts. Install dimmers on separate circuits from exhaust fans and other equipment to avoid interference.
Treatment lights are functional, not atmospheric. If you’re performing extractions, laser work, or injectables, add a focused overhead light on an adjustable swing arm with a color-corrected bulb (5000K or higher). This isn’t visible to clients during rest periods, hide it above a treatment curtain rod or in a recessed nook. Use it only during the active procedure.
Furniture and Fixtures Selection
Your treatment bed is the anchor piece and should feel like a luxury hotel bed, not a medical exam table. Invest in a heated spa bed or adjustable massage table upholstered in high-grade vinyl (not leather, which cracks and stains) or performance fabric rated for commercial use. These fabrics resist moisture, product spills, and sanitizing chemicals. A quality bed costs $800–2,500 depending on features: a budget option ($200–400) will show seams, sag, and staining within months.
Warm everything tactilely. Install radiant floor heating on a separate thermostat so clients’ feet stay toasty: concrete or tile without heat feels clinical. Add a heated blanket warmer (like those in high-end hotels) next to your treatment bed, prewarmed blankets add immense perceived luxury for minimal cost. A stainless-steel warmer runs $150–400.
Furniture beyond the bed should be minimal and purposeful. A small side table for products, a low seating area for a consultation zone, and closed storage (not open shelving) for supplies keep the space serene. Open shelving reads as cluttered, even when organized. Floating vanities or wall-mounted storage in the same finish as your walls maintain clean lines. Avoid wood furniture in high-humidity zones: it warps, swells, and splinters. Stainless steel, sealed concrete, or lacquered finishes resist moisture.
Faucets and fixtures should be commercial-grade. A simple, modern wall-mounted faucet in polished chrome or matte black costs $80–200 and outperforms cheap residential fixtures in durability. If you’re adding a small hand-washing station or foot-soaking area, use a single-lever design that minimizes contact points and is easy to sanitize.
Incorporating Wellness Elements and Materials
Med spa interior design thrives on sensory details that whisper rather than shout. A small tabletop water feature (a slate fountain or simple recirc unit) masks external noise and adds soft, grounding acoustics, better than silence, which can feel eerie. Keep it clinical and minimal: ornate fountains read as dated.
Toxin-free materials are non-negotiable. This isn’t a marketing phrase, volatile organic compounds (VOCs) from paint, adhesives, and off-gassing furniture trigger headaches and respiratory irritation in a space designed for healing. Choose low-VOC or zero-VOC paints, water-based adhesives for tile or wood, and furnishings certified by the Cradle to Cradle or GreenGuard programs. These cost slightly more upfront but improve air quality and client comfort.
Natural materials ground the space: large-format porcelain tile with a honed (matte) finish feels luxurious and hides fingerprints better than polished surfaces. Stone or stone-look finishes in soft grays or warm whites align with wellness aesthetics. Avoid glossy or high-shine finishes, they feel clinical and reflect light in ways that tire the eye.
Planting adds life without fuss. A single large fiddle leaf fig, snake plant, or monstera in a corner provides visual softness and improves air quality. Avoid fussy plants that need babying: a healthy, green plant in good light does more for ambiance than a struggling orchid.
Textiles matter. Luxury medical spas in high-end design spaces use linen, organic cotton, and performance fabrics in neutral tones. A single well-chosen throw blanket draped over a chair or weighted throw folded near the bed adds texture without clutter. Washable, sanitizable fabrics are essential, this is a wellness space, not a living room.
Sound absorption prevents echoing and maintains calm. Soft furnishings (cushioned seating, heavy curtains) absorb sound naturally. If the room feels echoey, add acoustic panels disguised as artwork or fabric-wrapped frames on walls. Commercial acoustic panels cost $30–80 each: three to four placed strategically dampen reverberation without a medical-office feel.
Systems integration keeps the space functional. Install a small, quiet HVAC unit or dedicated mini-split system to maintain 65–72°F and manage humidity. Noisy, undersized systems break the spell. A high-quality exhaust fan (not a cheap builder-grade duct fan) quietly removes steam and odors. Look for Energy Star-rated models rated at 50–80 CFM with low sone ratings (below 1.5 sones for quiet operation).
Lighting and modern design principles converge in med spa spaces where functionality and beauty must coexist seamlessly. Consider layered lighting, moisture-resistant materials, and design approaches rooted in minimalism and wellness, all of which create spaces where clients genuinely relax rather than simply show up.
Conclusion
Building a med spa interior design at home requires patience and thoughtful material selection, but the payoff is a space that genuinely supports wellness and professionalism. Focus on durable, moisture-resistant finishes, layered lighting, calming color, and furnishings that prioritize comfort over trend. Start small, a single treatment zone perfected beats a sprawling half-finished space. Your clients will feel the difference between a space built with intention and one thrown together, and that feeling is what transforms a room into a true sanctuary.